Check Reports
Access Check Reports
To access from the Button Bar, go to Reports/Exports > Check Reports

Print First Run Checks
-
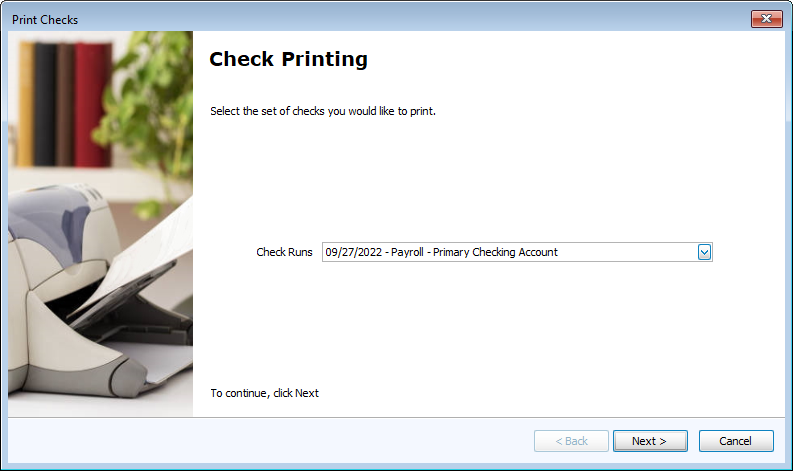
Select Date
-
If you have multiple check runs that have not been printed, select the date you want to print.
-
If there is only one check run to be printed, you'll open to the Assign Check Numbers Screen.
-
-
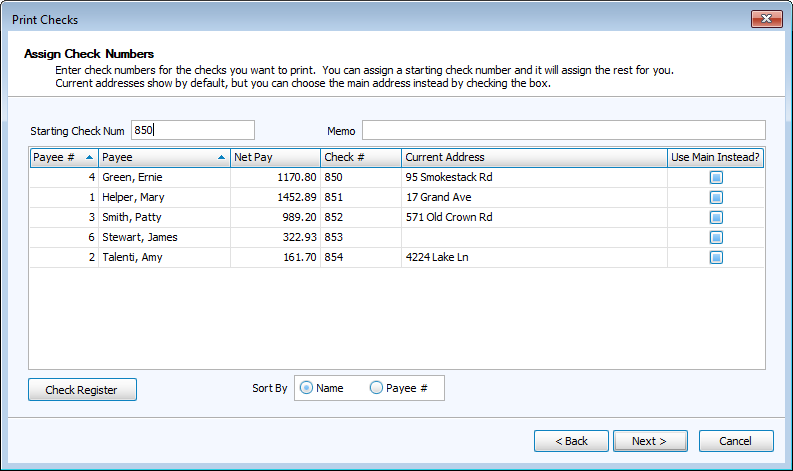
Assign Check Numbers
-
Enter a starting check number at the top. The remaining check numbers will fill in sequentially.
-
Optional: Enter a note on the memo field to appear on all checks.
-
-
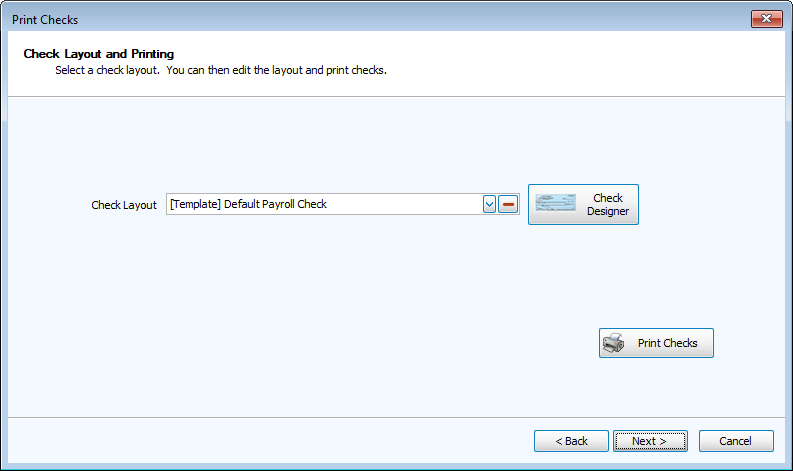
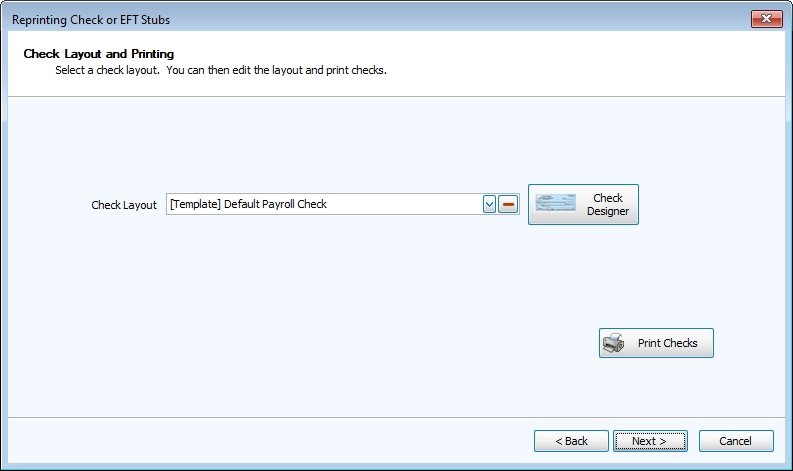
Check Layout and Printing
-
Use the default or select a saved layout from the Check Layout drop-down.
-
 is a tool to create custom check layouts.
 -
Click
 to review a print preview and to send them to your printer.
-
-
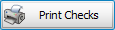
Post Printing Verification
-
If any checks did not print correctly, deselect the check mark on the left.
-
-
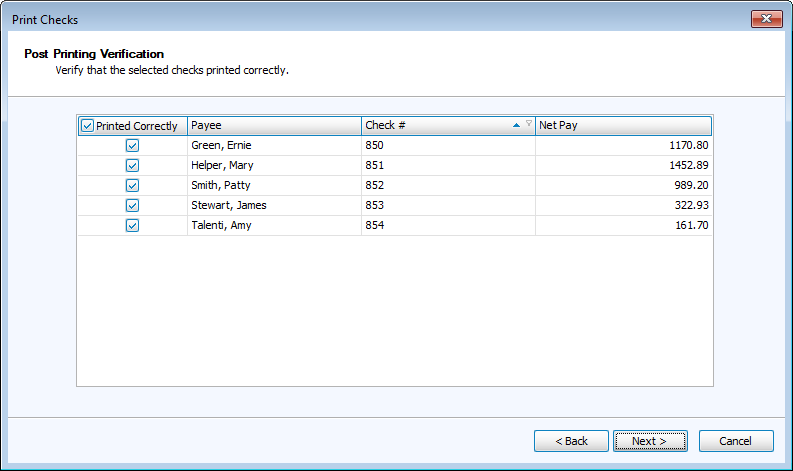
Summary
-
Click
 to exit.
-
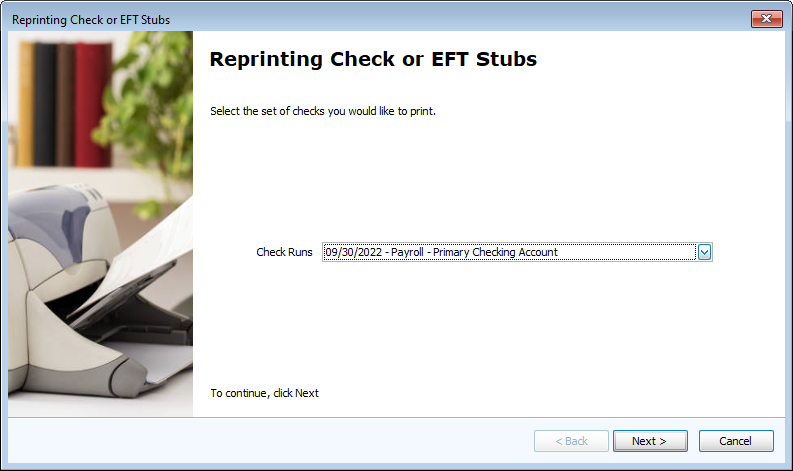
Reprint Check or EFT Stub
-
Select Pay Date.
-
Select Checks to Reprint.
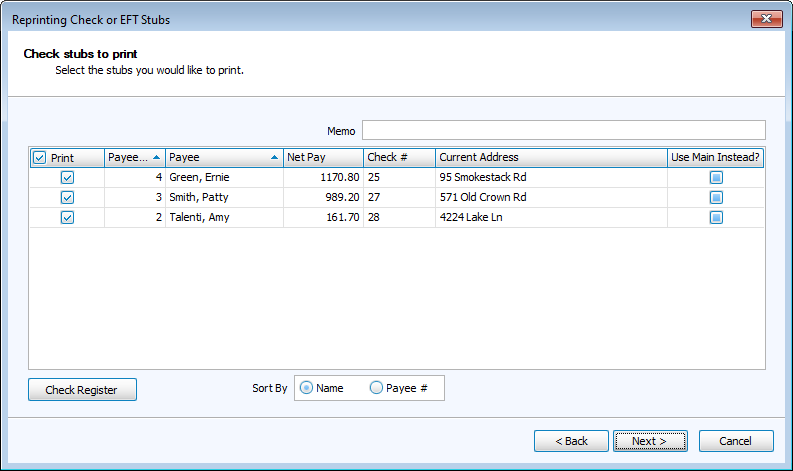
-
Check Layout and Printing.
-
Click Finish.
Check Register
The check register gives a summary checks produced through Payroll.
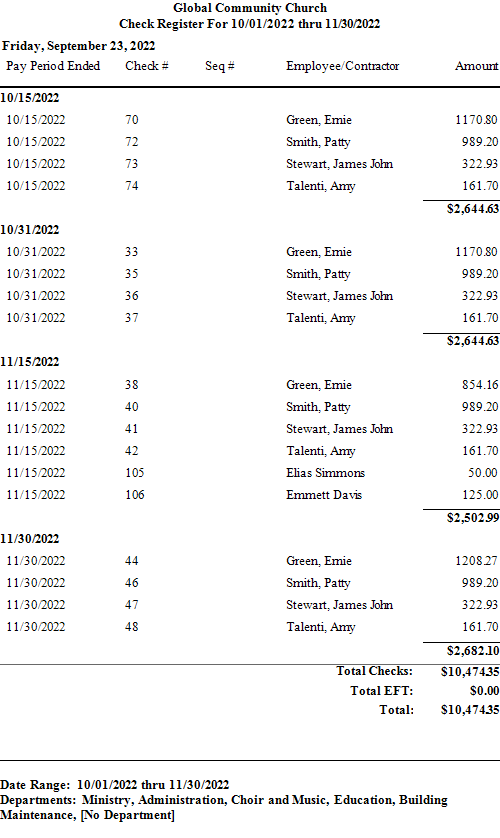
Date Range: 10/01/2022 thru 11/30/2022
Departments: Administrative, Choir and Music, Education, Building Maintenance, [No Department]
Available Report Information
Default Columns
-
Pay Date
-
Pay Period Ended
-
Check #
-
Seq #
-
Employee/Contractor
-
Amount
Additional Columns
-
Tax ID Number
Report Options
For more information about using report option tabs, click a link to open instructions in a new tab.
-
Select Payees - The Check register only has a filter by Department and pulls all employee information within the specified date range.